Change Screen Density On Zenfone - At this time Asus Zenfone Blog will share How to Change Screen Density (DPI) On Asus Zenfone with you. There are two ways to Change Screen Density On Zenfone, using Terminal Emulator app and use the App Settings module with the Framework on Xposed. Terms of second way is your Zenfone must be rooted.

Preparing Tool

Preparing Tool
The first method uses Terminal Emulator

Preparing Tool
- Terminal Emulator for Android (Download HERE)
Instructions
- Install Terminal Eulator, and then open
- Type:
su (enter)
wm density xxx (enter)
NB: xxx is the desired density, normally 320. which is often used is 240, 280 to minimize and to enlarge 360 ff.
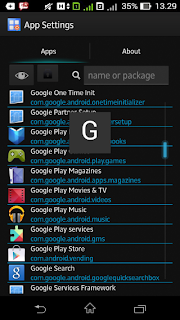
The second method uses App Settings

Preparing Tool
- Xposed Installer (download HERE)
- Install Xposed and Framework on Zenfone (Tutorial HERE)
- Tap menu Install/Update
- Search App Setting, and then Install
- Open the Settings App and look for applications that want changed density
So the difference between the two methods above is the first method to change the overall look while the second method is to change the appearance of most of the desired application only.
Similarly, how to change the screen density Zenfone, hopefully this way can be useful for you. And can reduce your discomfort when running the application or use ASUS Zenfone.
Similarly, how to change the screen density Zenfone, hopefully this way can be useful for you. And can reduce your discomfort when running the application or use ASUS Zenfone.

0 Response to "How to Change Screen Density (DPI) On Asus Zenfone"
Post a Comment